User guide: Red Hat Enterprise Linux on AWS
Get the most out of Red Hat Enterprise Linux on AWS
In this user guide we offer tips to effectively set up Red Hat® Enterprise Linux® on Amazon Web Services (AWS), and provide a few pointers for how to maximize the value of your Red Hat Enterprise Linux subscription. This guide will help you avoid pitfalls in the process of purchasing, deploying, configuring, and managing Red Hat Enterprise Linux instances on AWS, whether you are moving existing workloads to the cloud, or just getting started.
What is Red Hat Enterprise Linux on AWS?
When we are talking about Red Hat Enterprise Linux on AWS, there are 2 general categories that we are referring to.
- Red Hat Enterprise Linux purchased directly through the Amazon marketplace. You will use a base Red Hat Enterprise Linux image for Amazon EC2 and receive L1 technical support from AWS.
- Red Hat Enterprise Linux subscriptions purchased from Red Hat, or a certified Red Hat partner, and previously deployed on-premise. Whether you use image builder, golden images, or other custom image options, you have an existing Red Hat Enterprise Linux subscription that you are moving to an AWS cloud instance. You will retain your L1 technical support from RedHat.
Either of these methods are equally valid, and both result in a Red Hat Enterprise Linux instance that automatically receives updates at the same time updates are made available from Red Hat. You should be deliberate and purposeful about which one you choose, as they are intended for different use cases, which we cover below.
Why run Red Hat Enterprise Linux on AWS?
Running Red Hat Enterprise Linux on AWS offers several benefits, including enhanced scalability, flexibility, cost-efficiency, and access to a wide range of managed services. By using AWS’s global infrastructure, you can scale your Red Hat Enterprise Linux workloads to meet changing demands, reduce capital expenditure, and take advantage of various purchase models.
Harness the full power of an enterprise OS
Tap into the power of Red Hat Enterprise Linux
A subscription to Red Hat Enterprise Linux offers more than just access to the operating system (OS). There are numerous additional benefits, including:
- Red Hat’s extensive partner ecosystem with more than 5,200 hardware providers, 4,900 software providers, and 1,400 cloud and service providers.
- Coordinated support between Red Hat and your cloud provider with 24x7 support.
- A supported migration tool, Convert2RHEL, for streamlined migration from other rpm-based Linux OSs such as CentOS while maintaining existing customizations, configurations, and preferences.
- Red Hat Lightspeed, a robust service for visibility, analysis, and remediation across your Red Hat environment on premises and in the clouds from a single console.
- Red Hat Lightspeed (formally Red Hat Insights) boosts your subscription with AI-powered management and advanced security capabilities used to enhance your Red Hat experience. Gain visibility into business operations and security risks to proactively identify and mitigate issues across your infrastructure—before they affect your bottom line.
Red Hat Lightspeed helps you run Red Hat Enterprise Linux as a single platform
Red Hat Lightspeed comes at no extra cost with Red Hat Enterprise Linux and improves operational excellence by working smarter and with increased speed. The enhanced platform features offer:
- Visibility. Simplify management and monitoring with a comprehensive view of your full Red Hat Enterprise Linux estate.
- Proactive alerts. Notify administrators and stakeholders before an outage, or security event occurs.
- Deviation analysis. Analyze data across all environments, highlighting performance patterns and frequency distributions that could affect application performance.
- Compliance. Monitor systems against industry standards, helping you to maintain compliance, and assisting your efforts to improve your security posture.
Red Hat Lightspeed streamlines Red Hat Enterprise Linux management across diverse deployments, ensuring a consistent experience no matter where you install it, which is especially useful if you still have some of your workloads running on-premise in addition to those running on AWS.
This functionality is accessed through Red Hat Cloud Console. You will need to make sure your AWS account and your Red Hat account are connected and you are signed up for Red Hat Lightspeed. If you signed up for Red Hat Enterprise Linux through the AWS EC2 console, this connection might not have happened automatically.
Questions to answer before you begin
What is the use case for your deployment of Red Hat Enterprise Linux?
How you deploy your Red Hat Enterprise Linux instance on AWS depends on your use case.
A critical workload expected to run continuously for extended periods of time requires a persistent, stable, and highly available cloud infrastructure. Workloads that exhibit seasonal variance—experiencing high demand during certain periods and low demand during others—would also benefit from the cloud’s elasticity. This allows for rapid scaling up of resources during peak times and scaling down during off-peak periods, optimizing cost efficiency. These different use cases suggest different deployment models.
What is the most appropriate deployment model?
When choosing a deployment model, payment preference should be considered. Both an annual subscription and pay-as-you-go (usage-based) options have advantages and disadvantages, and the ideal choice largely depends on your specific requirements, budget constraints, and anticipated workload patterns. If budget predictability and simplified billing are paramount, a monthly or yearly rate may be most suitable. Conversely, if flexibility, cost-efficiency, and the ability to rapidly scale are essential, a usage-based model might be a better option.
Annual subscription
An annual subscription provides budget predictability, simplified billing, and generally a more competitive price for committing to longer-term plans. A fixed rate also eliminates the need for close usage monitoring. Subscriptions are available through your Red Hat account manager or a certified Red Hat partner. You may also qualify for the Red Hat Hybrid Committed Spend program which spans across clouds and on premise environments.
Pay-as-you-go
This payment option provides enhanced flexibility, freedom from longer-term commitments, and qualifies for AWS committed spend program, Enterprise Discount Program (EDP). This usage-based approach ensures you only pay for the resources you use, allowing for optimal cost allocation and rapid scaling in response to demand fluctuations. However, this model can result in unpredictable costs and necessitate continuous usage monitoring to prevent overruns.
It is important to note that if you are utilizing pay-as-you-go through EC2, there is no need to attach a Red Hat subscription. Attaching a RHEL subscription through subscription manager will not cancel any purchase made through the EC2 console and may cause double billing.
What do you need to get started?
After you have chosen the deployment and payment options that work best for your organization, you need two things to get started, an AWS account and your Red Hat account. If you do not have one of those or the other, set them up before you begin.
Deploying Red Hat Enterprise Linux on AWS
Just as there are various ways to pay for Red Hat Enterprise Linux on AWS, there are various ways to deploy an instance there as well.
Setting up Red Hat Enterprise Linux purchased through AWS
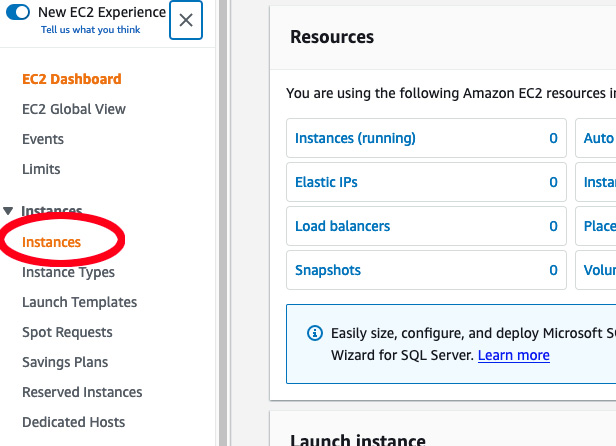
- Sign in: Sign into the AWS Management Console. Open the EC2 dashboard (you can find this under “Services”). In the EC2 menu, choose “Instances.”

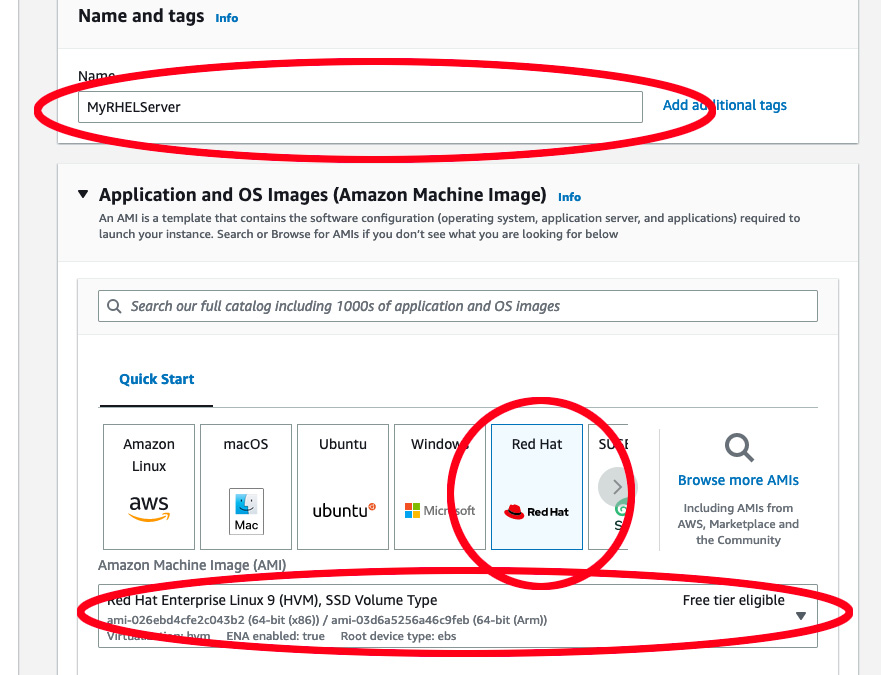
2. Create a new instance: Click “Launch Instance” to create a new instance. This will pop up a list of possible “Amazon Machine Images” you can choose from for your instance. Choose the version of Red Hat Enterprise Linux you wish to use (such as Red Hat Enterprise Linux 9), and select it.

3. Select an instance type: Next you will have to define the instance type. Amazon EC2 offers a wide selection of different instance types to fit different use cases which have varying combinations of CPU, memory, storage, and networking capacity. Select the combination that best fits your business needs.

4. Configure your instance details: On the “Configure Instance Details” page, you can specify detailed settings for your instance, such as the number of instances, purchasing options, networking, subnet, and more. This can be changed later, so if you want to move on, leave the default settings and select “Next: Add Storage.”
5. Add storage: Here, you can add a new volume to your instance or modify the settings of the root volume. This also can be reconfigured later, if need be.

6. Add tags: The next step on the “Add Tags” page lets you add metadata to your instance using tags. This step is optional.
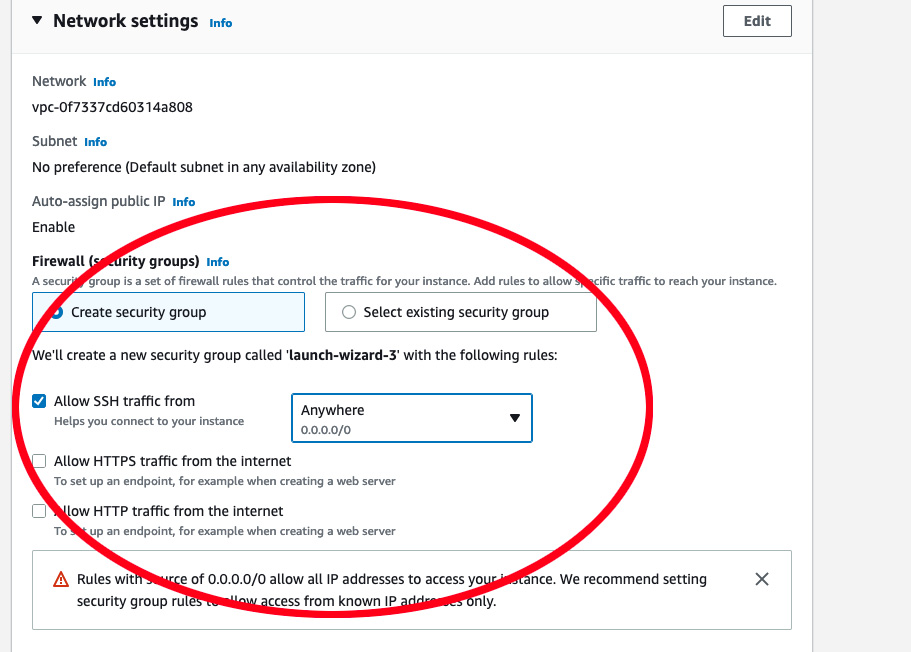
7. Configure security: This is a very important step where you will define the firewall rules that control the traffic for your instance. You can create a new security group and set rules as you see fit. For a basic setup, you might want to add a rule that allows SSH traffic (port 22) from your IP address. You can find out your local IP address here.
8. Review and launch: Review your instance configuration. If everything looks good, click “Launch.” You’ll be prompted to select an existing key pair or create a new one. This key pair is used to securely connect to your instance after it is running.
9. Key pair creation: If you did not have an existing key pair, select “Create a new key pair,” give it a name, and download it. Make sure to store this file safely, as you cannot download it again. If you lose this key pair, you will not be able to connect to your instance.
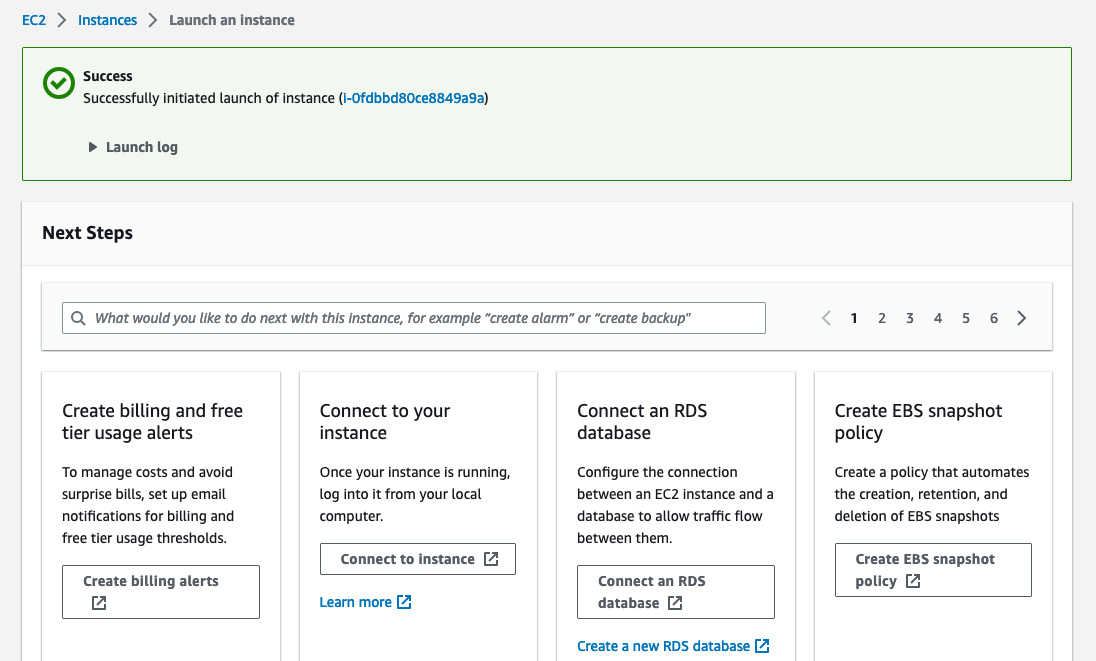
10. Launch status: After clicking “Launch Instances,” AWS will start the process of creating and initializing your instance. You will be redirected to a launch status page that shows the progress of these operations.
11. View your instance: Select “View Instances” at the bottom of the page to go back to the EC2 dashboard. You should see your new instance listed there. If it is not there, wait, as it may not populate onto the page for a few minutes
Installing a previously deployed on-premise Red Hat Enterprise Linux instance
NOTE: This is working from the assumption you are moving from a virtualized environment. If your on-premise instance was running on bare-metal, this process might have additional steps that are not included here.
Transferring from a previously deployed on-premise Red Hat Enterprise Linux instance requires a few additional steps before you do the setup in the previous section. Before you start, you should also assess plans around downtime and data transfer costs.
- Make a backup: Making a backup is a critical step of this procedure. You will be making core changes to your system, and a good backup may be your only recovery method if things do not go as planned.
- Create a disk image of the on-premise instance: Save this disk image to a file.
- If you are able to stop the server, you can create the image using “dd” by following the instructions here.
- If you are unable to stop the server, you can create the image using Logical volume management (LVM).
- Upload the disk image to an Amazon S3 bucket: Sign in to the AWS Management Console, create an Amazon S3 bucket (or use an existing one), and upload the disk image file to the bucket.
- Create a snapshot from the disk image: From the AWS Management Console, navigate to the EC2 dashboard. From there, go to “Snapshots” under “Elastic Block Store,” and create a new snapshot from the disk image file in your S3 bucket.
- Create an Amazon Machine Image from the snapshot: Still in the EC2 dashboard, go to “AMIs” under “images,” and create a new AMI from the snapshot you just created. Make sure to specify the correct architecture, root device name, and virtualization type of the existing on-premise deployment.
- Launch an EC2 instance from the AMI: Once your AMI is ready, you can launch a new EC2 instance from it. Click “Launch Instance” from the EC2 dashboard, and select your new AMI from the “My AMIs” section. From there, the process is the same as launching any other EC2 instance: Choose an instance type, configure instance details, add storage, add tags, configure the security group, review, and launch. You can follow the steps in the “Setting up Red Hat Enterprise Linux purchased through AWS” section to finish the process.
- Configure to match your on-premise deployment: Once your instance is running, you may need to perform additional configuration. Connect to the instance and check everything is running as expected. You may need to do updates, change configurations, or make other changes to match the on-premise instance.
Red Hat Enterprise Linux on AWS provides flexibility when it comes to deploying in the cloud. Learn more about the specific technical processes for setting up Red Hat Enterprise Linux on AWS.