
Put Your IDE in a Container
Apache Guacamole is an incubating Apache project that enables X window applications to be exposed via HTML5 and accessed via a browser. This article shows how Guacamole can be run inside containers in an OpenShift Container Platform (OCP) cluster to enable Red Hat JBoss Developer Studio, the eclipse-based IDE for the JBoss middleware portfolio, to be accessed via a web browser. You're probably thinking "Wait a minute... X windows applications in a container?" Yes, this is entirely possible and this post will show you how. Bear in mind that tools from organizations like CODENVY can provide a truly cloud-ready IDE. In this post, you'll see how organizations that have an existing well-established IDE can rapidly provision developer environments where each developer only needs a browser. JBoss Developer Studio includes a rich set of integration tools and I'll show how those can be added to a base installation to support middleware products like JBoss Fuse and JBoss Data Virtualization.
How does Apache Guacamole work?
Apache Guacamole consists of two main components, the Guacamole web application (known as the guacamole-client) and the Guacamole daemon (or guacd). An X windows application runs in an Xvnc environment with an in-memory only display. The guacd daemon acts as an Xvnc client, consuming the Xvnc events and sending them to the Tomcat guacamole-client web application where they are then rendered to the client browser as HTML5. Guacamole also supports user authentication, multiple sessions, and other features that this article only touches on. The Apache Guacamole website has more information.
Log in to OpenShift Container Platform
This was tested on a cloud-based OpenShift installation as well as a laptop using the Red Hat Container Development Kit. This article uses CDK 3, so please adjust accordingly if using an alternative OpenShift Container Platform installation. CDK3 leverages the minishift command to stand up a virtual machine for OCP:
minishift setup-cdk --default-vm-driver virtualbox

minishift start --cpus 4 --disk-size 50g --memory 10240 --username 'RHN_USERNAME' --password 'RHN_PASSWORD'
Substitute the RHN_USERNAME and RHN_PASSWORD credentials above with your login credentials from either the Red Hat Developer's Portal or the Red Hat Customer Service Portal. You also may need to change the command line flags or set additional command line flags for your environment. You can see all the options for the minishift commands by adding the --help option.
Make sure to also add the oc command to your executable search path. On my laptop, the path is $HOME/.minishift/cache/oc/v3.5.5.8/oc. Use whatever path is appropriate for your minishift installation. Minishift provides an easy way to do this automatically, via the command:
eval $(minishift oc-env)
Once minishift has finished starting up, determine the IP address for the minishift instance then log in:
IP_ADDR=$(minishift ip)

oc login https://$IP_ADDR:8443 -u developer
For minishift, the password is developer.
Enabling Unprivileged Guacamole Client Containers
The Guacamole project supplies Docker Hub images to simplify deploying Guacamole in a container. However, the guacamole-client runs as a privileged container by default. A thin wrapper around the Guacamole image was created so it could run unprivileged within OpenShift. Please refer to the guacamole-client-wrapper project on github for more information on how this was done. That project was used to extend the guacamole/guacamole image on Docker Hub to create the rlucentesejboss/guacamole image that is used for the guacamole-client.
Install the Guacamole Components
First, create a project for Guacamole within the OpenShift Container Platform:
oc new-project guacamole
A persistent MySQL instance stores Guacamole data including users and their credentials. Create the Guacamole MySQL instance and then modify it to use a persistent volume. The MySQL database persists users and connection parameters within Guacamole:
oc new-app mysql MYSQL_USER=guacamole MYSQL_PASSWORD=guacamole \

MYSQL_DATABASE=guacamole

oc volume dc/mysql --add --name=mysql-volume-1 -t pvc \

--claim-name=mysql-data --claim-size=1G --overwrite
The Guacamole image includes helper scripts for database initialization. Run the Guacamole image to create a database initialization script for the MySQL database. Use the oc run command to run the image with an alternative start command:
oc run guacamole --image=rlucentesejboss/guacamole --restart=Never \

--command -- /opt/guacamole/bin/initdb.sh --mysql
The initdb.sh command runs within a pod named guacamole. When the command completes, the MySQL initialization script will be in the container log. Put the initialization script into a SQL file and remove the pod:
oc logs guacamole > initdb.sql

oc delete pod guacamole
At this point, the MySQL pod should be fully running, but it may have restarted due to the deployment configuration change to add the persistent volume claim. Get the list of running pods to determine the pod-id for MySQL:
oc get pods
Identify the path to the MySQL client application within the pod. To do that, type the following:
oc rsh mysql-<pod-id> echo $PATH | cut -d: -f1

exit
Use the pod-id and the executable path from the above command to initialize the Guacamole database:
oc rsh mysql-<pod id> /mysql -h 127.0.0.1 -P 3306 \

-u guacamole -pguacamole guacamole < initdb.sql
The above line initializes the MySQL database with all of the tables and artifacts required to support Guacamole. Once the database is initialized, create an application where both Guacamole and guacd are in a single pod. The additional parameters will connect Guacamole to its database:
oc new-app rlucentesejboss/guacamole+guacamole/guacd \

--name=holy \

GUACAMOLE_HOME=/home/guacamole/.guacamole \

GUACD_HOSTNAME=127.0.0.1 \

GUACD_PORT=4822 \

MYSQL_HOSTNAME=mysql.guacamole.svc.cluster.local \

MYSQL_PORT=3306 \

MYSQL_DATABASE=guacamole \

MYSQL_USER=guacamole \

MYSQL_PASSWORD=guacamole
The last thing to do is expose a route for the Guacamole application:
oc expose service holy --port=8080 --path=/guacamole

oc logout
Configure Guacamole Users
Browse the the Guacamole application. On the CDK running VM, the URL is holy-guacamole.192.168.99.100.nip.io/guacamole. Make sure that the URL is appropriate for your environment. The login page for Guacamole will appear. Use the default username and password of guacadmin/guacadmin as shown:

Once logged in, go to the upper right hand corner and select guacadmin -> Settings in the drop down menu, as shown:
 Select the Users tab and then click the New User button:

Set the username and password to whatever you desire. As an administrator, you can create multiple user accounts that can use Guacamole to connect to their own instances of JBoss Developer Studio. Also, grant the permissions Create new connections and Change own password. Click Save to add the user:


Log out of the Guacamole web application:

The user is now configured to create a connection to their instance of JBoss Developer Studio and access it via a browser. Now let's build the JBDS container image and corresponding imagestream.
Build the JBDS Application
As an OCP administrator, build the JBoss Developer Studio container image and place the imagestream in the openshift namespace so that all users can access it. To limit the size of the container image, the JBDS installer file is downloaded at build time and then deleted after use. Get the appropriate URL for the JBoss Developer Studio installer. This has been tested against version 10.4.0.GA of the installer. To get the URL, browse to https://developers.redhat.com/products/devstudio/download/. Click the Stand-Alone download link for version 10.4.0.GA, as you see below:

The website will prompt you to log in. Use your credentials (or register if you haven't yet done so) and then cancel the download when it starts. Within the "Thank you..." box on the page, copy the link location for direct link, as shown:
 Build the image and create the imagestream. Make sure to paste the
 direct link URL after the INSTALLER_URL in the command below:
oc login https://192.168.99.100:8443 -u system:adminoc project openshift
oc new-build https://github.com/rlucente-se-jboss/jbds-via-html5 \
--name=jbds --strategy=docker \
-e JBDS_JAR=devstudio-10.4.0.GA-installer-standalone.jar \
-e INSTALLER_URL=
This will take some time to build the container image. When the build completes, log out as the administrator:
oc logout
The above commands have added the imagestream jbds to the openshift namespace. Now any user can quickly instantiate their own instance of JBoss Developer Studio using the pre-built imagestream.
Instantiate the JBDS Container
Each user simply provisions a JBDS container instance and then grants Guacamole permission to view it. Execute the commands below:
oc login https://192.168.99.100:8443 -u developer

oc new-project someproject

oc policy add-role-to-user view system:serviceaccount:guacamole:default

oc new-app jbds
Access the JBDS Container via a Browser
A developer can now access the JBoss Developer Studio application via a browser. On the CDK, the URL is holy-guacamole.192.168.99.100.nip.io/guacamole. Make sure that the URL is appropriate for your environment. When presented with the login screen, use the username/password that was created by the guacamole administrator. Once logged in, in the upper right hand corner select username -> Settings, as shown:

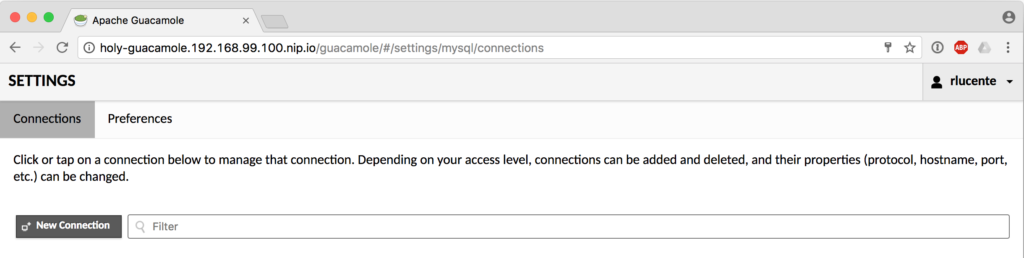
Select the Connections tab and then click the New Connection button:
Set the following parameters:
| Parameter | Value |
|---|---|
| Name | jbds |
| Hostname | jbds.someproject.svc.cluster.local |
| Port | 5901 |
| Password | VNCPASS |
Click Save to add the connection:

In the upper right hand corner, select username -> jbds to open the connection.

JBoss Developer Studio will appear within the browser window:

Go Crazy!
This article suggests a simple developer on-boarding process:
- The Guacamole administrator adds the developer to the Guacamole user database.
- The developer instantiates a JBDS instance.
- The developer logs in to the Guacamole web application and connects to their JBDS instance.
- The developer accesses JBDS via their browser.
Each developer needs nothing more than a browser to provision their IDE and begin developing applications.
Any X windows application should work in a container following the steps described in this article. Developers may prefer alternative development environments like the popular IntelliJ IDEA. To swap out the actual X windows application, you'll need to tweak both the Dockerfile and the start script at this project's GitHub repository. Also, this article did not address having a persistent workspace directory for the JBDS instance. As a suggested next step, a persistent volume claim or a StatefulSet should be considered to make the workspace directory persistent.
This article brings development with OpenShift Container Platform to an almost Inception level. In JBDS, a developer clicks on the OpenShift tab in the bottom pane and connects to the OpenShift cluster. They can develop additional applications on the OpenShift cluster using their JBDS instance, which itself is running on the OpenShift cluster.
Sull'autore
Ricerca per canale

Automazione
Novità sull'automazione IT di tecnologie, team e ambienti

Intelligenza artificiale
Aggiornamenti sulle piattaforme che consentono alle aziende di eseguire carichi di lavoro IA ovunque

Hybrid cloud open source
Scopri come affrontare il futuro in modo più agile grazie al cloud ibrido

Sicurezza
Le ultime novità sulle nostre soluzioni per ridurre i rischi nelle tecnologie e negli ambienti

Edge computing
Aggiornamenti sulle piattaforme che semplificano l'operatività edge

Infrastruttura
Le ultime novità sulla piattaforma Linux aziendale leader a livello mondiale

Applicazioni
Approfondimenti sulle nostre soluzioni alle sfide applicative più difficili

Serie originali
Raccontiamo le interessanti storie di leader e creatori di tecnologie pensate per le aziende
Prodotti
- Red Hat Enterprise Linux
- Red Hat OpenShift
- Red Hat Ansible Automation Platform
- Servizi cloud
- Scopri tutti i prodotti
Strumenti
- Formazione e certificazioni
- Il mio account
- Supporto clienti
- Risorse per sviluppatori
- Trova un partner
- Red Hat Ecosystem Catalog
- Calcola il valore delle soluzioni Red Hat
- Documentazione
Prova, acquista, vendi
Comunica
- Contatta l'ufficio vendite
- Contatta l'assistenza clienti
- Contatta un esperto della formazione
- Social media
Informazioni su Red Hat
Red Hat è leader mondiale nella fornitura di soluzioni open source per le aziende, tra cui Linux, Kubernetes, container e soluzioni cloud. Le nostre soluzioni open source, rese sicure per un uso aziendale, consentono di operare su più piattaforme e ambienti, dal datacenter centrale all'edge della rete.
Seleziona la tua lingua
Red Hat legal and privacy links
- Informazioni su Red Hat
- Opportunità di lavoro
- Eventi
- Sedi
- Contattaci
- Blog di Red Hat
- Diversità, equità e inclusione
- Cool Stuff Store
- Red Hat Summit