The Red Hat Enterprise Linux (RHEL) web console is a simplified web-based management tool that lets you manage many aspects of RHEL more efficiently. For more information on the web console and how to get started with it, refer to the Managing systems using the RHEL 9 web console documentation.
RHEL versions 9.1 and 8.7 were released in November 2022, and included a number of new features and enhancements related to the web console that will be highlighted in this blog:
- Support for system-wide cryptographic policies
- Improved kernel live patching
- Ability to edit custom firewall services
- Support for pinning services to the top of the services list
- Improvements to the diagnostic reports page
- Improved performance monitoring functionality
- Improved workflow when creating RHEL virtual machines
- Support for Podman container health checks
Support for system-wide cryptographic policies
Configuring the core cryptographic subsystems included in RHEL can be complex, and administrators previously had to manually configure many different configuration files to implement their desired settings across the system. RHEL 8 introduced the ability to set a system-wide cryptographic policy that configures many of the core cryptographic subsystems included in RHEL.
RHEL 8 and 9 include several predefined policies: DEFAULT, LEGACY, FUTURE and FIPS, which are explained further in the using system-wide cryptographic policies documentation.
The web console was enhanced in RHEL 9.1 and 8.7 to now support viewing and changing the system-wide cryptographic policy.
To configure this policy, go to the Overview page in the web console, and refer to the Configuration card, where you’ll see the currently configured crypto policy:
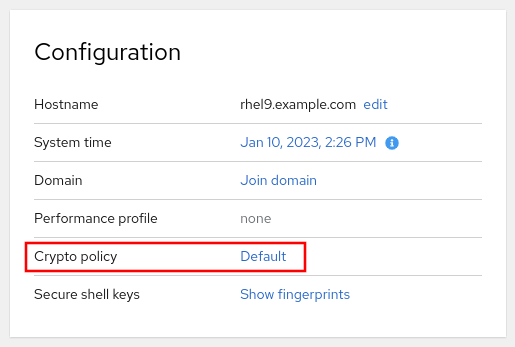
This system is currently using the Default policy, and you can change the policy by clicking on it, which will bring up the following screen:
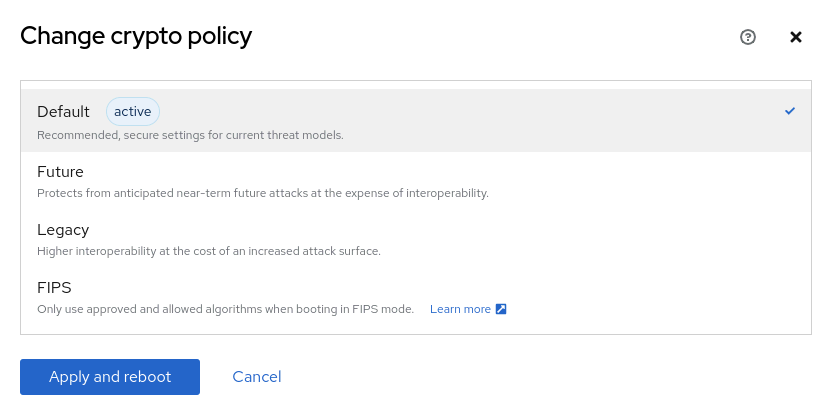
Note that the web console will reboot the system when changing the crypto policy.
Improved kernel live patching
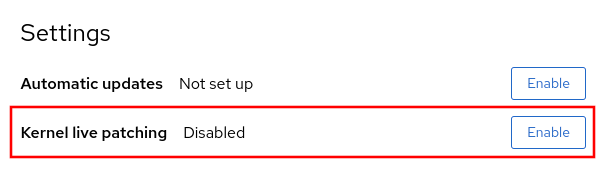
RHEL supports kernel live patching, and this functionality was initially supported in the web console in RHEL 8.5 (for more information, see the Applying patches with kernel live patching in the web console documentation). To enable this feature (in RHEL 8.5 and later), navigate to the Software updates section of web console, and look for the option to enable kernel live patching:
When you enable kernel live patching in the web console, the currently-available kernel live patch is installed. Until RHEL 9.1 and 8.7, however, after that point, if a new kernel live patch was released, you could not use the web console to install only the latest kernel live patch—you also had to install all other security patches.
That changed in RHEL 9.1 and 8.7, when an enhancement was added to the web console, so you can now only install the latest kernel live patch without updating other packages on the system. If a new kernel live patch is available, you will now see an Install kpatch updates button:

Editing custom firewall services
The web console lets you manage the firewall, including adding custom ports to a zone. Prior to RHEL 9.1 and 8.7, however, once added to the firewall, these custom ports could not be further configured—changes required you to delete the custom service from the firewall, and then re-create it with the edits/updates.
With RHEL 9.1 and 8.7, the web console now supports editing custom firewall services.
For example, I’ll log in to the web console, and click Networking from the menu. From here, I can click the Edit rules and zones button on the Firewall card. I’ll then click the Add services button and select Custom ports. From here, I’ll specify TCP ports 8080 through 8090, and 9090 through 10000, and change the ID to my-custom-ports.
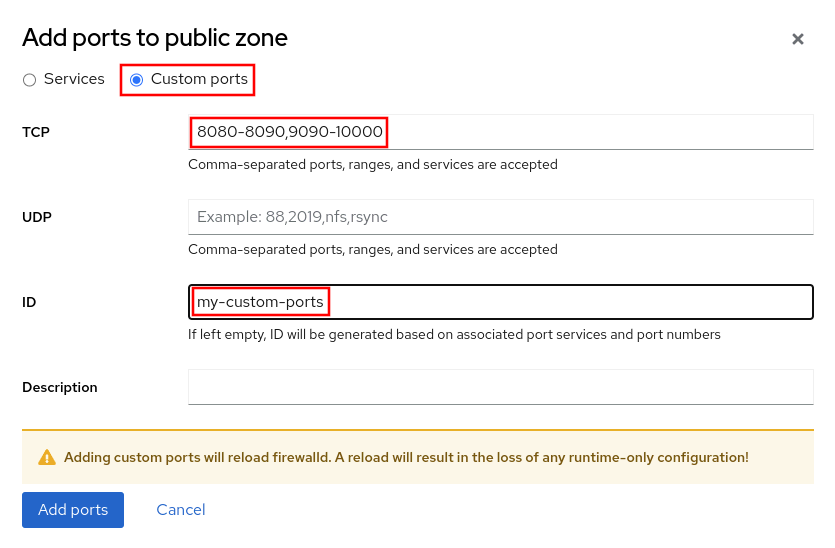
After clicking Add ports, the firewall will be reloaded and the specified ports will be enabled in the firewall.
With RHEL 9.1 and 8.7, I can now click on the ellipsis to the right of my-custom-ports, and click on Edit. At this point, I can make any necessary changes to the TCP ports, UDP ports, or description, and click on the Edit service button to apply the changes.
Pinning services to the top of the services list
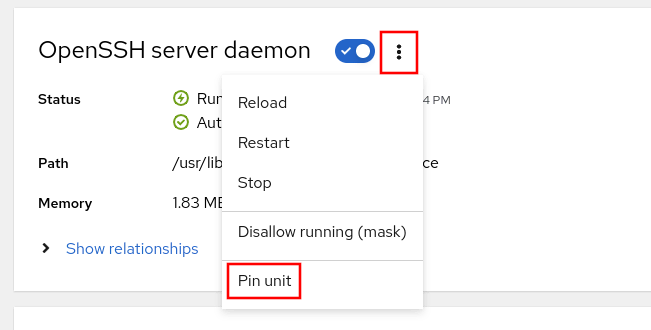
It is now possible to pin services to the top of the services list, so you can quickly see the services that are most important to you. As an example, I’ll go to the Services menu in the web console and click on the sshd service. I can then click on the ellipsis, and select Pin unit.
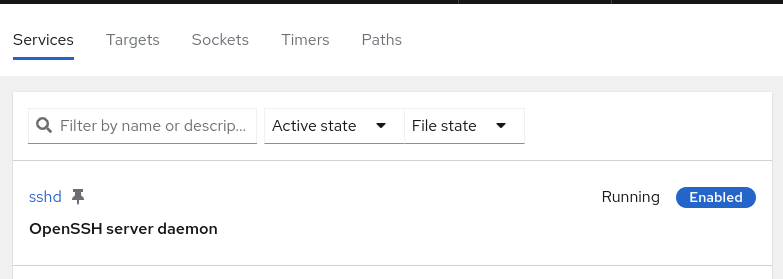
If I go back to the services list, the sshd service now shows up at the top of the list, with a pin icon next to it.
Improvements to the diagnostic reports page
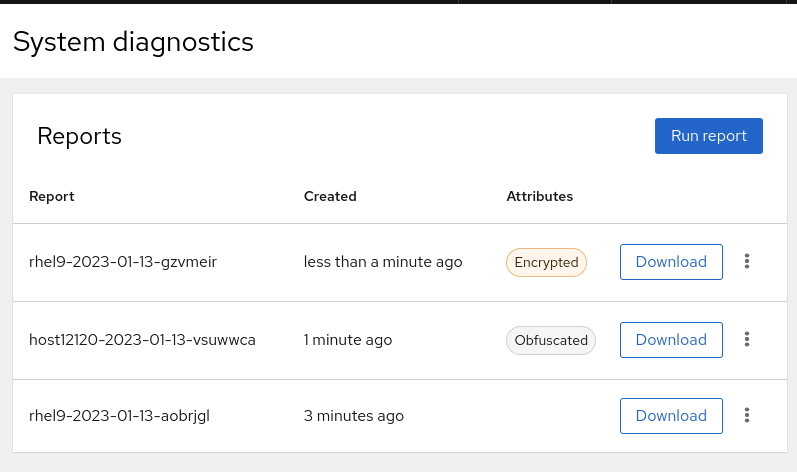
The diagnostic reports page on the web console allows you to generate an sosreport, which is often requested when working with Red Hat Support. Sosreports are an archive of information about a system and they include items such as diagnostic and configuration information. In RHEL 9.1 and 8.7, the diagnostic reports page in the web console has had several updates, including the ability to label the sosreport, optionally encrypt the sosreport, optionally obfuscate certain data within the sosreport, and the ability to access previously generated sosreports.
You can access the page by logging in to the web console and clicking on Diagnostic reports in the menu. From here, you can see a list of previously generated sosreports.
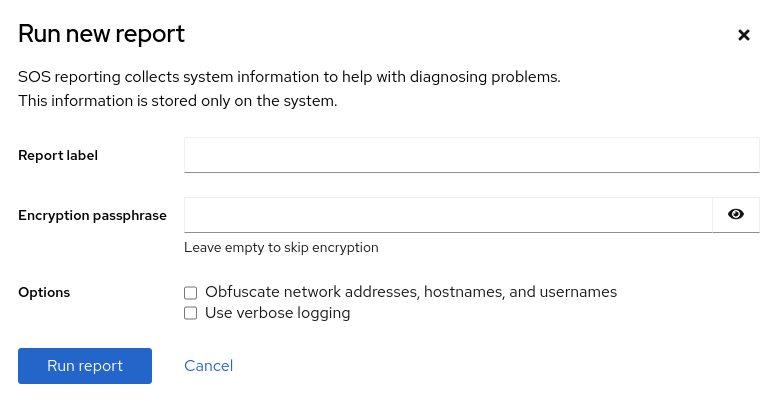
Click on Run report to generate a new sosreport. You can then optionally label the sosreport, specify an encryption passphrase, specify if you’d like to obfuscate certain data within the report, and specify if you’d like to enable verbose logging.
Improved performance monitoring functionality
There were several enhancements related to performance monitoring in RHEL 9.1 and 8.7. For systems with multiple CPUs, the web console now shows two real time CPU status bars—one for the average CPU utilization for all CPUs, and one for whichever CPU has the highest utilization:
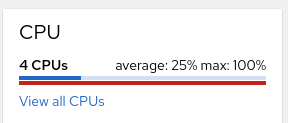
In this screenshot, we can see that there are four CPUs on the system, with an average utilization of 25%, and one CPU that is maxed out at 100%. This indicates that there might be a single threaded process maxing out one of the individual CPUs. You can also click View all CPUs to see information about each CPU’s utilization:

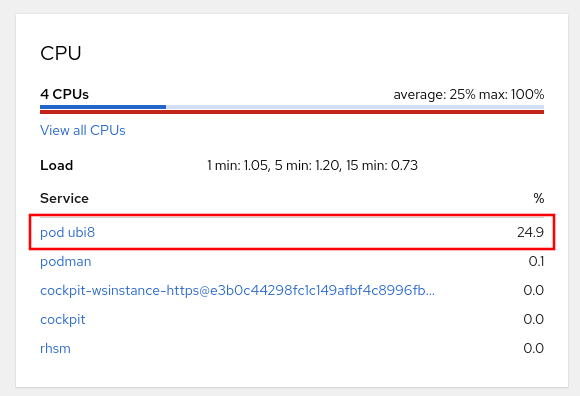
The web console now also includes containers in the list of top CPU and memory consumers. For example, in this example, I have a Podman container named ubi8 that is utilizing 24.9% of the CPU.
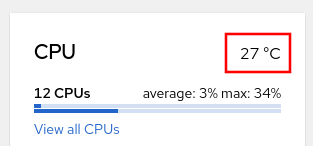
And finally, the web console now shows the current CPU temperature if available, along with a warning or critical icon depending on the temperature.
Improved workflow when creating RHEL virtual machines
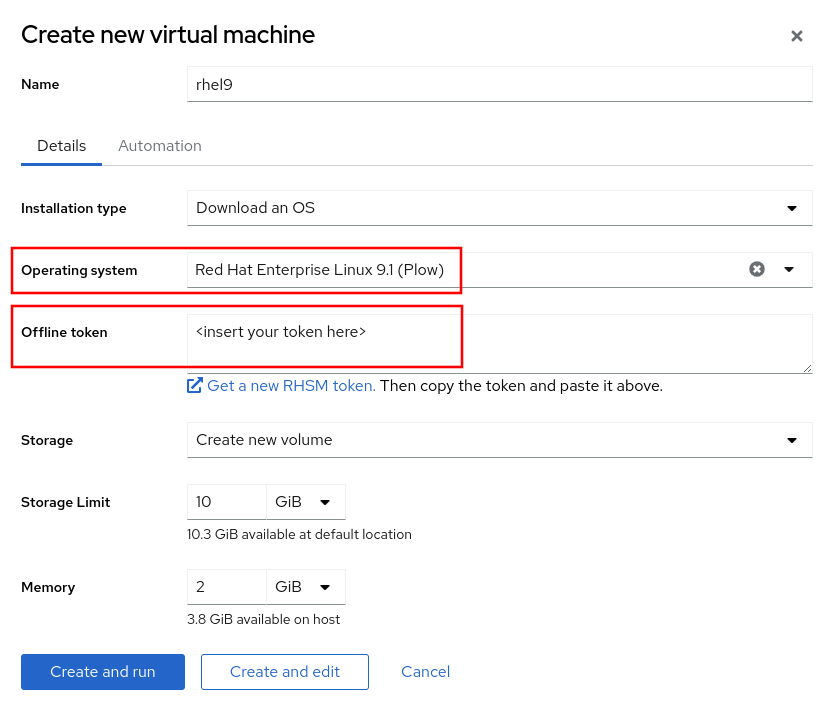
The web console now supports downloading RHEL when building a RHEL-based virtual machine. When creating a new virtual machine, if you specify the Download an OS option for the Installation type, and choose a version of Red Hat Enterprise Linux as the Operating system, you’ll have a field where you can paste in an offline token from the Red Hat customer portal. A link is provided to the page on the customer portal that can be used to generate the offline token. When you click on the Create and run button, the selected version of RHEL will be downloaded using the offline token.
Support for Podman container health checks
The web console now supports defining Podman health checks so that you can monitor the health of containers. For more information on Podman health checks, refer to the RHEL documentation.
To use this functionality, first make sure that you have the Podman application installed by clicking on Applications in the menu.
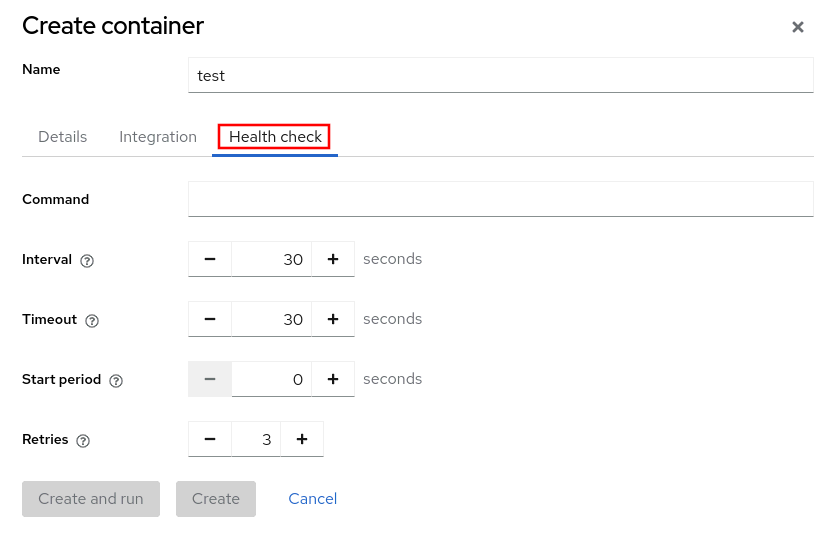
Then click on Podman containers in the menu. From here, click on the Create container button. There is a new tab on the create container screen labeled Health check where you can define the health check command and other related attributes.
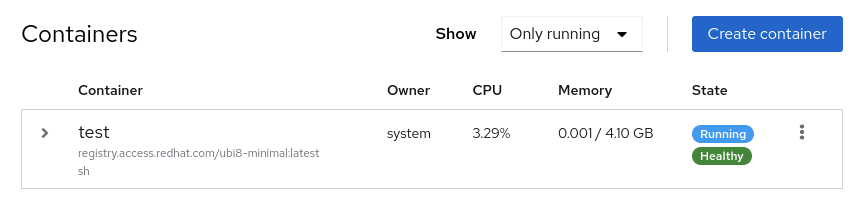
Once the container is running, you’ll see the status of the health check under the State column of the list of running containers:
Learn more
RHEL 9.1 and 8.7 included a number of exciting enhancements and new features related to the web console. If you’d like to try the RHEL web console, check out our interactive self-paced labs that allow you to experiment with and learn more about it:
Sull'autore

Brian Smith is a product manager at Red Hat focused on RHEL automation and management. He has been at Red Hat since 2018, previously working with public sector customers as a technical account manager (TAM).
Altri risultati simili a questo
More than meets the eye: Behind the scenes of Red Hat Enterprise Linux 10 (Part 6)
Red Hat Enterprise Linux now available on the AWS European Sovereign Cloud
The Overlooked Operating System | Compiler: Stack/Unstuck
Linux, Shadowman, And Open Source Spirit | Compiler
Ricerca per canale

Automazione
Novità sull'automazione IT di tecnologie, team e ambienti

Intelligenza artificiale
Aggiornamenti sulle piattaforme che consentono alle aziende di eseguire carichi di lavoro IA ovunque

Hybrid cloud open source
Scopri come affrontare il futuro in modo più agile grazie al cloud ibrido

Sicurezza
Le ultime novità sulle nostre soluzioni per ridurre i rischi nelle tecnologie e negli ambienti

Edge computing
Aggiornamenti sulle piattaforme che semplificano l'operatività edge

Infrastruttura
Le ultime novità sulla piattaforma Linux aziendale leader a livello mondiale

Applicazioni
Approfondimenti sulle nostre soluzioni alle sfide applicative più difficili
Virtualizzazione
Il futuro della virtualizzazione negli ambienti aziendali per i carichi di lavoro on premise o nel cloud